Step-by-Step Guide: Sealing Your Shower Tray Effectively
February 9, 2024
If you’re like me, you’ll agree that there’s nothing more annoying than a leaky shower tray. Not only can it cause water damage to your bathroom, but it’s also a potential safety hazard. So, how can you fix this issue? The answer is simple – by sealing your shower tray.
Sealing a shower tray isn’t as daunting as it sounds. With the right tools and a bit of know-how, you can do it yourself. This step-by-step guide will walk you through the process, making it as easy as pie. You’ll be surprised at how a little DIY can save you a lot of hassle in the long run.
Stay tuned as I share my expert tips and tricks on how to seal a shower tray effectively. Whether you’re a seasoned DIY enthusiast or a complete novice, this guide is for you. Let’s dive right in, shall we?
Why do shower trays leak?
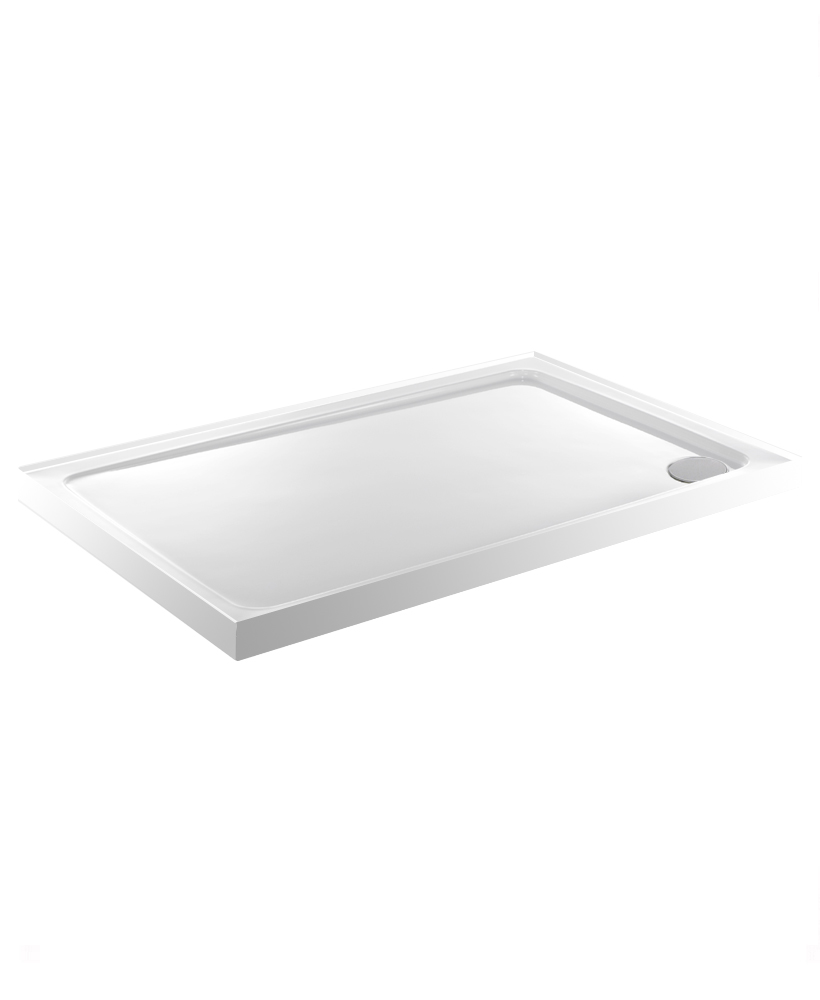
After working hands-on with various Dublin bathroom supplies for years, I’ve come to understand the numerous reasons why shower trays might start leaking. There’s always a misconception that only a low profile shower tray is susceptible to leaks; but in reality, any shower tray, irrespective of its design, can spring a leak when it’s not properly sealed or maintained.
One major reason a shower tray leaks is due to poor installation. When a shower tray isn’t properly aligned with the drain, it can result in water pooling and eventually finding its way out through cracks and openings. This is a common situation especially in showers that are frequently used or in bathrooms where Dublin bathroom supplies might not have been properly installed.
Take, for instance, the case of a shower tray sealant that has worn out or cracked. This would no doubt provide an avenue for water to seep through. Silicone sealant, the wonder material often used to seal the junction between a shower tray and the wall can fail overtime, leading to leaks. More so, the wear and tear due to regular use can create tiny fractures in the shower tray, even if it’s a robust low profile shower tray.
Frequently, the issue of leakage isn’t noticed at the beginning. It starts as a minute seepage, but over time, with the constant movement of water, it increases and the leak worsens. As pressing as this issue may seem, the solution isn’t far-fetched. Operating on the principle of ‘prevention is better than cure’, it is important that we keep our eyes open to signs of potential leakage and address the issue before it escalates.
For a savvy DIY enthusiast, identifying these potential problems would be a breeze but for a beginner, it could pose a bit of a challenge. Luckily, there are clear signs such as water appearing in places where it shouldn’t, compromising the structural integrity of your bathroom. When these signs are noticed, you can either DIY the repair or seek professional help.
Catching a leak early can save you from costly repairs and inconveniences later. It’s definitely worth the effort to regularly inspect the shower area to maintain your peace of mind while enjoying your shower.
Let’s move on to understanding how we can effectively seal a shower tray. Stick around as we get our hands deep into the process.
Tools and materials needed
The first stage in sealing a shower tray is having the correct tools and materials at your fingertips. Regardless if it’s a regular or low profile shower tray, these essentials remain the same.
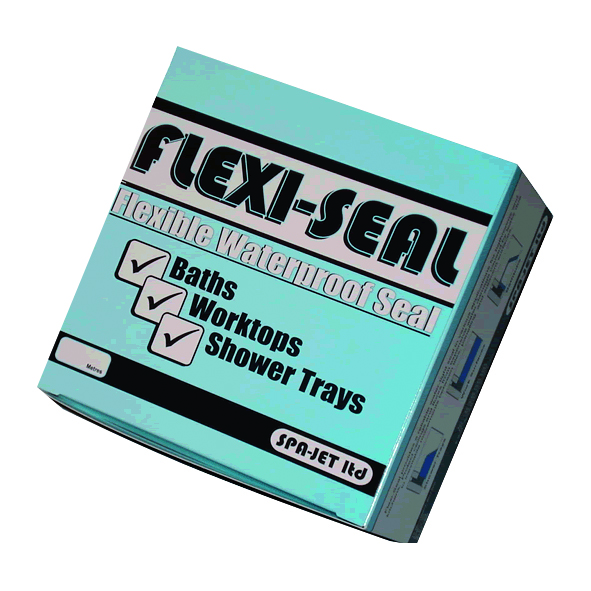
First and foremost, you need a high-quality bathroom sealant. Since the bathroom is often moist and humid, it’s crucial to use a sealant specifically designed for such environments. This way, you are not just sealing any potential leaks, but also protecting the material of the shower tray against damage. Make sure to choose high durability, mould resistant sealant as moisture and warmth in the bathroom could otherwise turn it into a breeding ground for mould and mildew.
A sealant gun is another important tool that is needed for the process. While it might seem like an overspending for such a small task, investing in a good sealant gun is often the difference between a clean, professional quality job and a messy, amateur one.
Also, make sure to have a sealant smoothie tool at hand. This tool helps to ensure the sealant is applied smoothly and evenly when pressed into the gap. However, in a bind, a simple plastic spoon or even a finger can do the trick.
In the list of materials, don’t forget cleaning materials. You’ll need a mild detergent or a specialist bathroom cleaner to clean the surface before sealing. Joint surfaces have to be clean, dry and free from any dust or loose material for the sealant to adhere properly.
It would also be wise to have masking tape on hand. It’s great for creating clean, straight lines by masking off the edges.
Finally, as with most DIY tasks, protection equipment should be included. A pair of DIY gloves, for instance, will prevent direct contact with the sealant and any potential skin irritations.
To find an adequate range of tools and materials, I personally recommend checking out our extensive range of products to cater for your needs.
And there you have it: your essential toolkit for sealing a shower tray.
Essentials
Description
Bathroom Sealant
Used to seal gaps and prevent leaks
Sealant Gun
Helps ensure a smooth, uniform application
Sealant Smoothie Tool
Ensures sealant is applied evenly
Cleaning Materials
Required to prepare the joint surfaces
Masking Tape
Useful for creating clean, straight lines
DIY Gloves
Step 1: Preparation
Before embarking on sealing your shower tray, you’ll want to make sure you’ve got everything in order – that’s where preparation comes into play. Remember, the key to a clean, professional finish starts long before the sealant gun is ever in your hands.
Firstly, it’s immensely crucial to clean the area around the shower tray before starting. Any dirt, grime, or old sealant can prevent the new sealant from adhering properly. I personally recommend using an old toothbrush and a mild detergent to scrub the area thoroughly. Rinse with water afterwards and wipe it dry. It’s also important to remove any traces of mould or mildew because these won’t just affect the application of the sealant but can also cause health issues down the line if not taken care of.
After cleaning, your shower tray, whether it’s a low profile shower tray or a standard one, should be bone dry. If there’s water remaining, it might compromise the way the sealant cures, leading to a subpar seal that won’t last long. A quick yet effective way to ensure this happens is by using a hairdryer to remove any hidden moisture traces. Give it a good going over until you’re thoroughly satisfied that no moisture remains.
Next up is masking. Masking off the area with tape isn’t just for amateurs; even us professionals do it. This step ensures that you have neat lines and prevents sealant from getting onto surfaces where it shouldn’t be. Use the masking tape to line the edge of the shower tray and the wall. Leave a small gap where the sealant will go.
Finally, don’t forget about personal protection. Always wear DIY gloves when applying sealant as it can be pretty sticky and get everywhere if you’re not careful.
All your preparation materials can be easily found among the vast selection of Dublin bathroom supplies. Our range and quality can’t be beaten, and we’ve got everything you’ll need for this job.
Be sure to stay tuned and continue with the next step where I’ll remind you of the importance of selecting the right sealant.
Step 2: Clean and dry the shower tray
After gathering all the necessary tools and wearing my DIY gloves, I’m ready to jump right into the meat of the task – cleaning and drying the shower tray. This step plays a vital role in ensuring that the sealant adheres strongly to the shower tray, giving you a leak-proof seal. Now, let’s dive into how to do it properly and efficiently.
The first part calls for thorough cleaning. I start by removing any existing sealant residue on the shower tray with a sharp blade. This can be a bit daunting, although ensuring that no sealant remnants are left behind is crucial to creating an ideal surface for the new sealant.
Next, I’ll scrub down the entire tray, especially the areas that require sealing. I’m using a quality shower tray cleaner, which is available at Dublin bathroom supplies, to get rid of scum, grime, or mildew. While cleaning, it’s important to pay attention to Mould patches as a new sealant won’t adhere to these. Always use an anti-mould cleaner for such patches.
Equally important is drying the Shower Tray. After a thorough cleaning, my next step is drying the shower tray completely. A high-quality microfibre cloth works best for me, as it absorbs all the moisture and leaves no residue behind. It’s worth emphasising that the shower tray needs to be completely dry before the sealant is applied. For those dealing with a Low Profile Shower Tray, every corner should be painstakingly cleaned and dried, given their compact size and design intricacies.
Remember, patience in these steps is key. A perfectly clean and dry shower tray ensures a strong bond with the sealant, giving you a durable and long-lasting seal. A correctly sealed shower tray doesn’t just come together, it’s the result of careful preparation and attention to detail. When you’re doing these steps yourself, it’s definitely a job that demands time.
So, make sure that you’ve all the necessary supplies for the task. If you are running short on any supplies, from a sealant gun to cleaner, or even DIY gloves, don’t worry; everything is available under one roof at Thermoparts
Step 3: Apply silicone sealant
It’s about time we got down to the nitty-gritty of this job: application of the silicone sealant itself. Many might assume this to be a straightforward process, yet it’s far from it. In fact, applying silicone sealant evenly all around your shower tray is where the real craftsmanship lies.
Firstly, cut the tip of your sealant tube at a 45-degree angle. This will ensure a smooth, consistent bead of sealant as you move around the tray. Also, make sure the hole is big enough to squeeze out an adequate amount of sealant but not too large to control the flow. Then slot the tube into your sealant gun and you’re all set.
Before you start applying, double-check your masking tape placement. Remember to place it around the outer edge of the low-profile shower tray, which should divert excess sealant away from the centre. This is a sweet little tip that will give your shower tray a professional and neat finish.
Now for the application itself. Hold your gun at a 45-degree angle to the joint you’re sealing. Apply a consistent bead of sealant all around the shower tray’s edge, making sure there isn’t a break in the line. Remember, it’s important not to rush this process. If you don’t get it right the first time, you might have to start over.
You might find your bathroom cluttered with unnecessary items at this point. Cleaning up as you go can make the sealing process even smoother. For this, I often depend on the abundance of supplies available at Dublin bathroom supplies. Their comprehensive line up of DIY equipment can be a great help not just for cleaning, but also for sealing duties.
After applying the sealant, smooth it out immediately with a sealant smoothing tool or a plastic spoon. This will press the sealant into the gap between the shower tray and the wall, giving a well-finished, professional appearance to your shower tray.
And there you have it. We’ve successfully applied the silicone sealant around the shower tray. But don’t remove the masking tape just yet. It needs to stay put until your sealant is fully dried, which could be anywhere between 12 to 48 hours. We’ll explore more about this in our next steps. Be sure to keep on reading.
Step 4: Smooth out the sealant
After applying the sealant around your shower tray, the next crucial step is smoothing it out. This procedure ensures the sealant secures tightly to both the bathroom tiles and the low profile shower tray while concurrently achieving a clean and professional look.
First off, you’ll need your sealant smoothing tool. Should you not have one available, a simple plastic spoon from your kitchen drawer is an adequate alternative. The tool will run along the freshly applied bead of silicone, smoothing it into the joint to achieve a clean finish and ensure the sealant’s robustness. Here, it’s crucial to remind that you’re after a steady, continuous movement—try not to stop midway.
Initially, the sealant might prove a bit sticky and may glide unevenly. Still, don’t let that deter you: apply a bit of soapy water to the tool, and it’ll glide over the sealant smoothly. Moreover, this process helps the silicone develop a skin, aiding it to dry nicely.
Remember, in all this process, haste could be your number one enemy. It’s far better to devote an adequate amount of time smoothing the sealant rather than rushing the task. High-quality results are always the product of patience and precision.
During this step, it’s also worth considering the avoidance of unnecessary mess. Silicone can prove challenging to remove if dried in the wrong areas, and cleaning as you go along will make the task significantly easier.
Folks in Dublin have a leg up here, as Dublin bathroom supplies offer a vast range of cleaning products specifically tailored for this task. These products deliver an immaculate finish and provide ease of application—a blessing during a meticulous job like sealing a shower tray.
Reckon the task is finished now, do you? Not yet. Leave the masking tape in place until the silicone sealant is wholly dried! The drying process can take anywhere between 12 and 48 hours, depending on the conditions.
Step 5: Let the sealant dry
At last we’ve reached the final stretch in our journey to seal a shower tray. It’s imperative now to let our work come to fruition by allowing the sealant ample time to dry.
Patience is the key here. Yes, as much as you might want to test out your newly sealed tray, jumping the gun before the sealant is completely dry could compromise the quality of the work and lead to leaks. So now, after all the diligent work put into this, it’s about waiting out the drying process.
Sealants typically take between 12 to 48 hours to fully cure. This time range can, however, vary based on the specific product used, the temperature of the room, and the relative humidity levels. Ensure you keep a check on all these factors to determine the accurate drying times. In case of any confusion, it’s always advisable to follow the product manufacturer’s instructions.
During this drying period, the masking tape we used to achieve neat sealant lines should remain in place. It can be tempting to remove it prematurely but resist that urge. All your effort to produce a crisp, neat seal finish could be undone if the tape is peeled off before the sealant is fully cured.
While waiting might not seem like an active step, it’s absolutely crucial. It assures the integrity and efficiency of the seal. Once the sealant is completely cured, you’ll be all set to enjoy your low profile shower tray to its fullest.
While your sealant dries, why not utilise this downtime to peruse some of Thermoparts’ Dublin bathroom supplies? They offer a wide range of premium-quality cleaning products suitable for maintaining your bathroom’s cleanliness and prolonging the life of your shower tray. It’s an excellent opportunity to create an even more welcoming and relaxing bathroom environment.
Step 6: Check for any leaks
After patiently waiting for the sealant to dry, it’s time to move onto the next critical step. Your shower tray, ((low profile shower tray for some)), now sealed and dried, needs an important check – for any possible leaks.
In my experience, the best method to check for any leaks is to conduct a water test. Fill up the shower tray with water until it’s to the overflow point, then wait. I would advise hoping for the best, but preparing for the worst. Any leakage problems will become evident within a short amount of time.
Stay alert during this period for any signs of water dripping down underneath the shower tray. Pay attention to potential problem areas such as joints or sealant lines. If you discover any leakage during this test, remember, it’s not the end of the world. You’ll simply need to identify the source of the leak and apply more sealant if necessary.
This entire process pays significant dividends in the long-term. It confirms whether or not your sealing process has been successful and affords peace of mind knowing that your shower will not cause any future water damage. Trust me, taking your time to make sure your shower tray is properly sealed reduces potential headaches in the future.
With your shower tray now sealed and leak-free, it’s time to focus on its care and maintenance. Using quality cleaning products is crucial in preserving the integrity of your shower tray. Personally, I prefer using Thermoparts’ selection of bathroom supplies when I am shopping for bathroom and maintenance essentials.
They offer a wide variety of products that can help keep your bathroom spotless and in perfect working condition. This increases your bathroom’s lifespan and keeps it looking brand new! So even though it’s tempting to skimp on quality to save money in the short term, it’s definitely worth investing in the right supplies for the best long-term outcome.
Additional tips and tricks
Shower tray installation can feel overwhelming, especially if it’s your first time tackling such a task. But don’t fret. I’ll share some of my go-to tips and tricks to guide you through the process smoothly.
Firstly, ensure you’re starting with the right materials. Shower trays come in different types, with the Low Profile Shower Tray gaining popularity due to its sleek design. These trays sit low to the ground, making them an excellent pick for modern bathrooms – they’ll blend seamlessly with the floor.
In some scenarios, I advise using a foam or planks method, especially with low profile tiles. The method helps level the floor surface, distribute weight evenly, and reduce the chances of cracking.
Next, let’s talk about sealant application. Most beginner mistakes I’ve seen involve using too much sealant. Be modest with your sealant – a little goes a long way. However, ensure you fill all gaps. You don’t want water sneaking into unwanted places.
Then, pay close attention to the drying time. Admittedly, it’s tempting to test the waters – literally – once you’re done. But give the sealant ample time to cure. Typically, most brands recommend a 24-hour waiting period before exposing it to moisture. Stick to that.
Speaking of brands, don’t skimp on quality when choosing your sealant. Your toolkit should include a solid, reputable sealant. This is your bathroom’s defence against water damage – it’s not a place to cut corners.
Consistent maintenance is crucial in prolonging the life of your sealant and shower tray. Clean regularly using quality cleaning products. Avoid abrasive cleaners that can damage the sealing or make it brittle.
Good luck! Remember, patience is key in this process – don’t rush it. And if you encounter any problems, don’t fear to call in professional help. It’s better to get it done correctly than dealing with leaks down the line.
The Wrap Up
I’ve walked you through the process of sealing a shower tray. It’s clear that having the right tools and materials is essential. Don’t forget the importance of using quality sealant and maintaining it regularly. This’ll prolong the life of both the sealant and your shower tray.
Remember, patience is key in this process. Take your time to ensure the job is done right. If you’re ever in doubt, don’t hesitate to call in a professional. After all, it’s better to get it right the first time than to deal with leaks and damages later on. Here’s to a leak-free shower tray and many enjoyable showers ahead!
What are the necessary tools and materials for sealing a shower tray?
The exact tools and materials can vary, but the article stresses the importance of using the correct ones for the job, as well as using quality sealant. Specifics should be listed in the step-by-step guide.
How can the life of the sealant and shower tray be prolonged?
You can prolonge lifespan of the sealant and shower tray can with the use of quality sealant and through regular maintenance.
What if I am having difficulties with the installation?
We suggest being patient with the installation process and advise seeking professional help if necessary.
When you’re decorating your bathroom it can be the little things that might seem insignificant now that can finish the room off to the standard you want. A new bathroom suite or shower cubicle might look great, but the wrong bathroom taps can spoil the whole look.
For your heating system to be effective and energy efficient you need to have the right radiators and radiators valves for each room. There is a large selection of radiator shapes and sizes available, so how do you know which ones are best for your home? There are certain things to consider, and then hopefully your home will always be warm without the heating cost being astronomical.
To provide the best experiences, we use technologies like cookies to store and/or access device information. Consenting to these technologies will allow us to process data such as browsing behavior or unique IDs on this site. Not consenting or withdrawing consent, may adversely affect certain features and functions.
Functional
Always active
The technical storage or access is strictly necessary for the legitimate purpose of enabling the use of a specific service explicitly requested by the subscriber or user, or for the sole purpose of carrying out the transmission of a communication over an electronic communications network.
Preferences
The technical storage or access is necessary for the legitimate purpose of storing preferences that are not requested by the subscriber or user.
Statistics
The technical storage or access that is used exclusively for statistical purposes.The technical storage or access that is used exclusively for anonymous statistical purposes. Without a subpoena, voluntary compliance on the part of your Internet Service Provider, or additional records from a third party, information stored or retrieved for this purpose alone cannot usually be used to identify you.
Marketing
The technical storage or access is required to create user profiles to send advertising, or to track the user on a website or across several websites for similar marketing purposes.